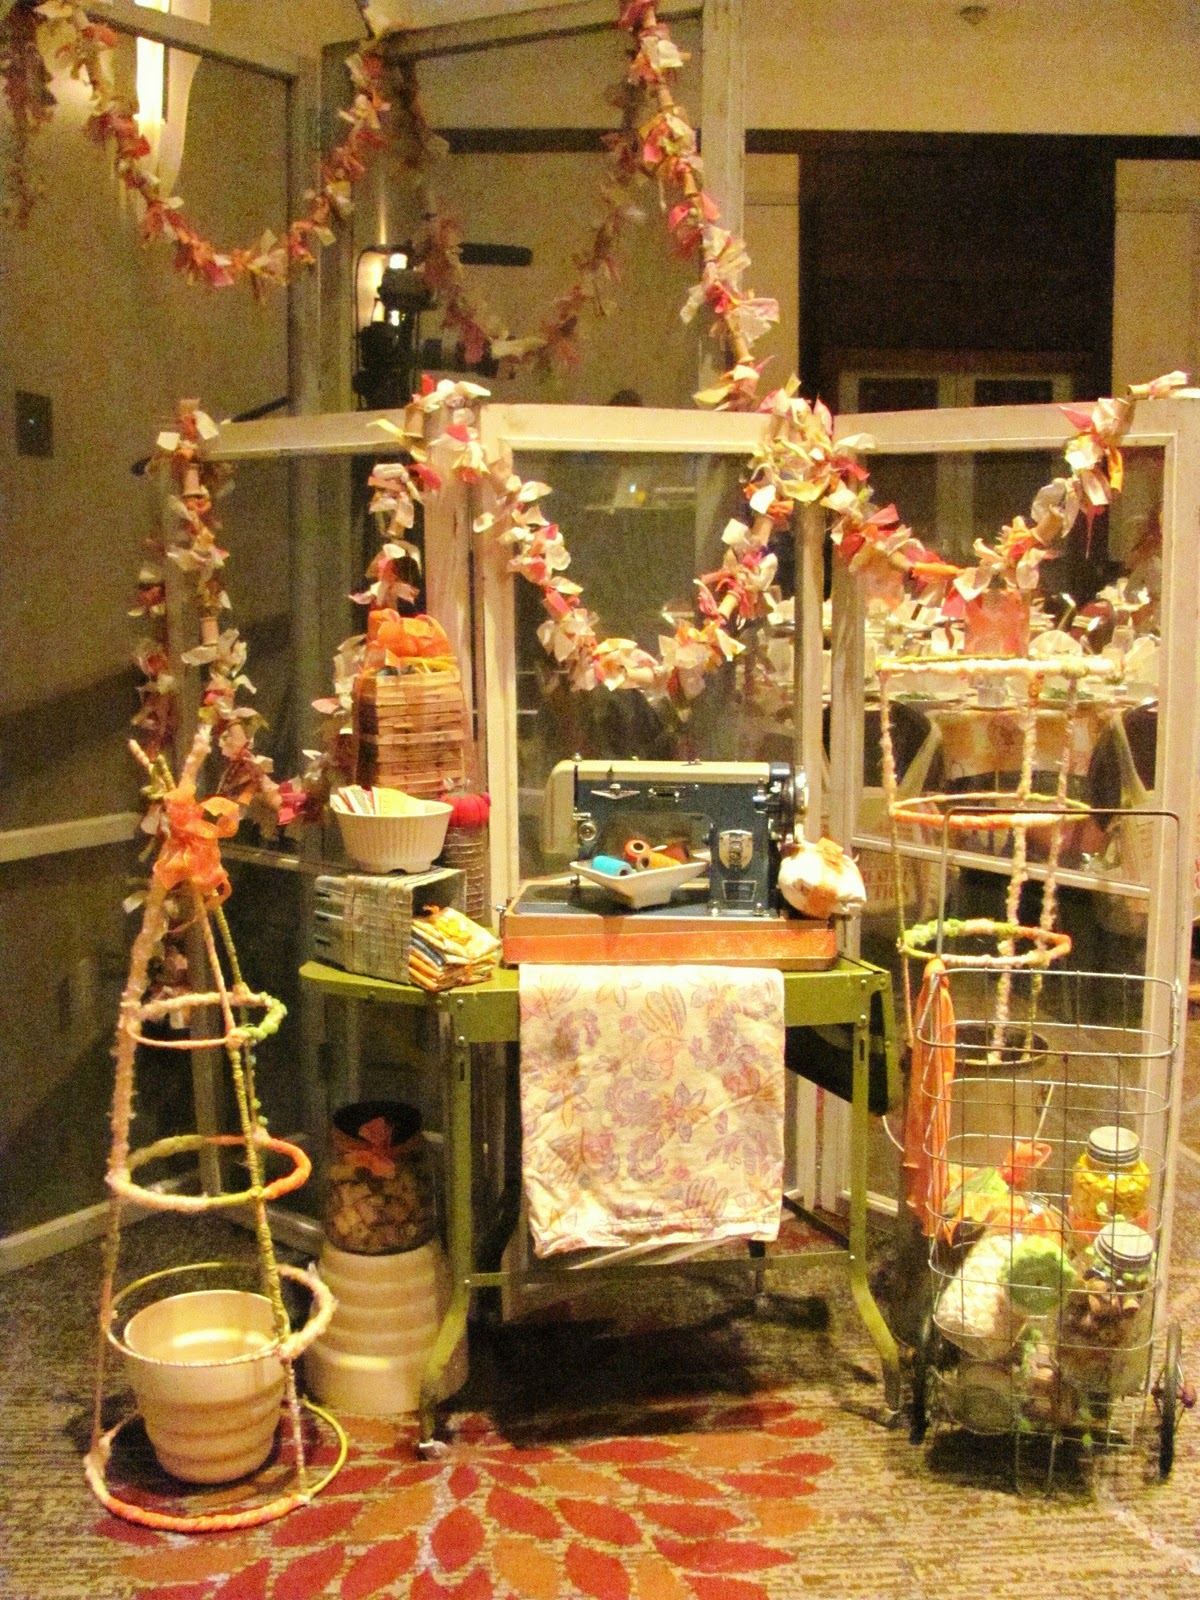
At every meal at the Creative Connection, I set up a different vignette at the entry to the ballroom-something to set the mood and give people a little wow as they walked in. For the gala dinner, I had a lot of fun playing with color and vintage goodies. To give a nod to our keynote speakers,
Amy Butler and
MaryJane Butters, I used a mix of sewing items and farm and garden staples.
I also included a couple of simple, crafty projects that were inspired by everyday objects. (Ok-I'll also admit that I've been a little obsessed with wrapping things in yarn lately. It's the wanna be knitter in me)
The yard and garden section of home stores were also a big influence on my designs for the weekend. Cheap. Bulk. Two very key words. 50 cent tomato cages seemed to be ripe with possibility. Oh, well, what do you know-seems they are a perfect thing to wrap in yarn. (They'll also show up again later for another centerpiece..) I chose colors that would match my palette, then started wrapping. I tied the end securely to a spot where the metal crosses, then made sure to end up there again to tie it off. If you try one at home, just have fun with different weight yarn, varying thickness and doubling up.
It was very meditative, and I love the final product. My vision was to have tall stemmed flowers pouring out of the top, but I ended up liking them just as they were-one right side up with a planter in the middle, and one plopped upside down in a vintage metal shot bucket. Of course, these would also add a great splash of color to your garden!
If you've been keeping up, fabric scraps have been playing a large role in my Creative Connection designs. Here is another version of a garland, fit for draping over a doorway or festooning your craft room.
I used yarn for a base (it seems I had a little extra lying around), but any twine, string or similar medium would work. This is easy, but labor intensive, so pop in a good movie or queue up some reruns of Project Runway.
First, cut your yarn to desired garland length, then tie a couple of fabric scraps (cut about 1"wide and 4"long) to secure the end. I also tied a loop on the end of my yarn for hanging later. Now, just alternate tying fabric scraps, threading wooden spools and clipping wooden clothespins.
Once you've reached your desired length, tie another loop at the end. Now you can hang it up and admire it! This is such a sweet example of everyday objects combined to make a not so everyday result.


Wow--how long did it take to wrap a tomato cage in yarn? I love the look, but it seems like it would take a REALLY long time.
ReplyDeleteAmazing Girl.... I am just oohing and ahhing over everything.. You did good!
ReplyDeleteEverything you do is so HAPPY! You spread the Joy wherever you go my friend.
ReplyDeleteHugs to you for a great weekend...I am off to the pumpkin patch to find a few white pumpkins...I just can't imagen what you would do with white pumpkins...your autumn home must be amazing!
xoxoxo
Marisa...I did them a little bit at a time-when I needed to sit and take a break from other work. You should really try one-or start with a small wire object...it's quite relaxing, and you start to really get into it-layering and overlapping and building up different textures!
ReplyDeleteDawn-glad you get to see the event a bit through these posts-Thanks!
Koralee-white pumpkins! I'm heading the the market this afternoon for apples and pumpkins and who knows what else!
Have a lovely, lovely weekend sweet one!
xxoxo to you all...c
Great delivery. Outstanding arguments. Keep up the
ReplyDeletegood effort.
Here is my homepage Work from home
This is a really good tip especially to those new to
ReplyDeletethe blogosphere. Brief but very precise info… Thanks for sharing this one.
A must read article!
Also see my site: how to play piano