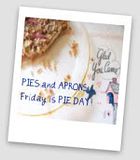
Oh-custard-how do I love thee? Let me count the ways.
1. Buttermilk
2. Lemon
3. Coconut
These are all mighty fine additions to a custard pie, but what happens when you add all three at once?
Custard pie nirvana.
It's still a bit warm, but I couldn't resist any longer (and I couldn't keep y'all in suspense any longer).
I was so excited by the first bite that I had to share it with someone, so I ran next door to give my neighbors a taste. I ended up leaving the plate over there, but luckily, I still have the rest of the pie here.
Make this for your Easter dinner! Yes-do it!
All of my favorite pie ingredients in one custard pie Pie
(I may have to come up with a more succinct name. I'm game for suggestions)
single 10" pie crust
1stick butter, softened
1 1/4 c sugar
3 large eggs
2/3 c buttermilk
1 t vanilla
1 T lemon juice
1 T lemon zest
1 cup shredded coconut
-cream the butter and sugar until light and fluffy
-add the eggs and beat until pale yellow and creamy
-add the buttermilk, vanilla, lemon juice and zest
-stir in the coconut and pour into prepared crust
-sprinkle top with additional coconut (3-4 T)
-bake at 400 degrees for 10 minutes
-reduce heat to 350 degrees and bake for an additional 35 minutes
(until pie is golden and custard is set)
-cool before serving (or just dig in with a spoon)
Friday, April 2, 2010
Thursday, April 1, 2010
Easter egg displays
If you're running short on preparation time for your Easter brunch, brown eggs are a time-saver.
No dying necessary, just hard boil, add some Easter grass and a clever container,
and your centerpiece is ready.
Here, a vintage bundt pan forms the base and simple petals are cut from brown paper bags.
A wooden cheese box and burlap table runner make for a rustic and understated table.
Now that the table is set, you can focus on Easter dinner, and of course, Easter pie!
Labels:
Easter
Wednesday, March 31, 2010
springtime wreath
With the early arrival of spring, I had cleared out all of the winter decorations from the front of the house, and things were looking a little bare. After purchasing some wreath forms during a craft store stock-up, internet inspiration struck hard. First, I saw this post on one of my favorite blogs, then a Facebook friend posted this wreath she found on etsy. A springtime wreath for my front door was obviously in the cards.

I gathered my materials and got to work.
(ok-this actually took a number of days of working on it between other projects)
My wreath is wrapped with a combination of yarn and twine.
I like the juxtaposition of the bright and natural colors.
For a real burst of spring,
I added a fabric flower brooch (borrowed from the jewelry room, of course),
and some mini felt flowers.
To keep the back of the wreath tidy and visually interesting, I added some polka dot ribbon.
This wreath has definitely perked up the front of my house....
can't wait until the pansies arrive in the greenhouses!
Labels:
DIY
Tuesday, March 30, 2010
collecting: egg plates
Deviled eggs are a treat, and I like to have a few deviled egg plates on hand for serving. Lots of fabulous ceramic egg plates are out there, but I have always found them a bit cumbersome to store. Their egg cradles (that is a technical term, I'm sure of it) make them wobbly and apt to tumble when stacked in a cupboard. Enter my old faithful of collectibles-plastic...............
These lovelies stack neatly and come in a dreamy palette of springtime pastels.
Use them to serve deviled eggs at your Easter brunch, or showcase an array of colored Easter eggs.
Labels:
Collecting,
Easter
natural easter egg dyes
I have tried natural egg dyes in the past, and it always seems hit or miss. There are a few things that work really well, and a lot of things that are rather iffy. This year I experimented with whatever I could find in my kitchen that might work as a dye, and the results were much the same.
Blueberries seemed like a sure bet-they always seem to stain things that you don't want them to stain, right?
The color was a rather nice shade of blue, but spotty and inconsistent.
Dandelion tea produced a nice shade of pale brown.
Considering that I can easily buy eggs of this color, it seemed like wasted time and resources-hmmphh.
I bet that you will never guess what produced this moonscape of a green egg....
cranberries. yup.
I know, it shocked me too.
I pulled it out of the dye with visions in my head of a pale pink beauty.
Chemistry types, please feel free to offer up explanations
of cranberry and egg reactions.
Yellow onion skins were my fallback, because they have always produced beautiful eggs for me.
This year was no exception. Eggs with a rich and wonderful orange-yellow coating.
For all of these dyes, I started with about a cup of my dye materials in heat proof bowls. I then added
about 2 cups of boiling water and 2 T of vinegar. Let the eggs soak until the water cools a bit, then move them, still in the dye, to the refrigerator overnight.
Labels:
Easter
Holiday with Matthew Mead giveaway!
Head over to Holiday with Matthew Mead to find out how you can win the opportunity to have your blog or online shop mentioned in the magazine. Holiday with Matthew Mead is a "book-azine" celebrating and offering inspiration for the Christmas holiday season. To be released in October 2010, Holiday is offered via online orders only - in limited quantities - and will not be sold on newsstands. But, by simply following the BUY HOLIDAY MAGAZINE link below their banner, you can reserve your own copy of this beautiful magazine, with guaranteed delivery of the magazine straight to your mailbox! Holiday with Matthew Mead is144 pages of holiday inspiration with well-known and admired designers, bloggers and top-notch features, printed on beautiful paper and not drowning in ads!
Now, head on over for your chance to win!
Monday, March 29, 2010
Easter egg tote
Last week, I was browsing around Home Depot looking for inspiration for an upcoming backyard project.
I didn't find much inspiration for our backyard, but I did find some for a simple Easter project.
These wire frames-rebar chairs-grabbed my attention and brought to mind the old wire drinking glass carriers. At 57 cents each, I grabbed a few to take home. With Easter projects on the brain, it didn't take long to realize that the frame was just about the same size as an egg carton. I cut the lid off of the egg carton, leaving a bit of a lip and angling the cut to match the other side.
I didn't find much inspiration for our backyard, but I did find some for a simple Easter project.
These wire frames-rebar chairs-grabbed my attention and brought to mind the old wire drinking glass carriers. At 57 cents each, I grabbed a few to take home. With Easter projects on the brain, it didn't take long to realize that the frame was just about the same size as an egg carton. I cut the lid off of the egg carton, leaving a bit of a lip and angling the cut to match the other side.
Next, I stitched the frame onto the egg carton using a large needle and some colorful yarn.
(does that count as sewing?!)
With some Easter grass and freshly dyed eggs, this makes an adorable (and inexpensive!) Easter egg tote.
I am packing this week's Pies and Aprons posts with simple Easter projects, so keep hopping by,
and your Easter celebration is sure to be a hit.
Labels:
Easter
Subscribe to:
Posts (Atom)